 |
 |
 |
 |
 |
| Menu: |
| Home |
| Store |
| Buying |
| X-Sales |
| Info |
| FAQ's |
| Contact |
| Links |
 |
| Fallschirmjager.Biz Information Helmets: Faking a Fallschirmjäger Helmet: 2 |
|
The helmet is removed from the ingredients after being left for as long as you desire. The longer the time the darker the leather becomes, so don't make it black unless you want it to looked burnt! You will notice the wear around the crown of the helmet. This is where most wear is sustained as most paratroopers will place their helmet down onto the crown. There will also be wear around the rim where the paint is thinner and the rim catches the terrain. |
|
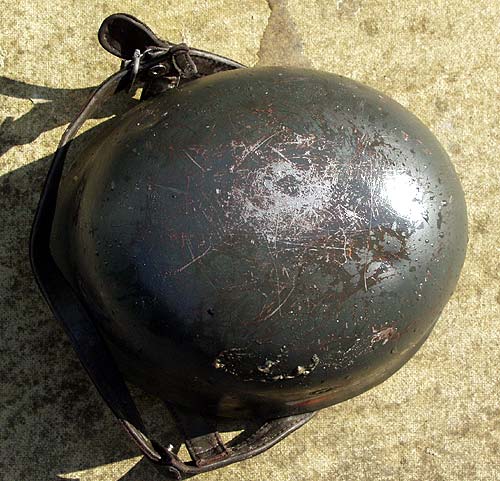
Pic 21 - Note heavy wear where it should be. |
Many replicas don't take into account that aluminium does wear, so a good way to spot many (but not all), fakes is to check the aluminium band. You need to find a corrosive material and apply this to the band to give it nice ageing 'pits'. I won't mention what I use but its available in most kitchen cupboards! This can also be applied to the strap fittings and the whole helmet if you want but avoid the decals or they will come off. So we have aged it pretty much as far as we can to this point. We are trying to replicate a helmet worn over time, so the best thing to do now is to leave it outside in the open for approx. 60 years! OK so we can't wait 60 years, but we do want rust to gather and ideally not just a light orange rust. There is a chemical way to create deep dark rust but I won't go into this process. Since we will be repainting the helmet just leave it outside for a few weeks to start the rusting process. Remember to dampen your helmet and dust it in salt every day or so, paying attention to the strap fittings. The weather also helps to age the straps and linings so turn it over every few days also. The longer you leave it the better the rusting. Week 3: Once the rusting is done to your satisfaction, then comes another fun bit, painting the helmet! Unfortunately I forgot to take pictures of the rusting before I painted it but we'll see that in the final few pictures. Picture 22 & 23 shows the application of the paint. |
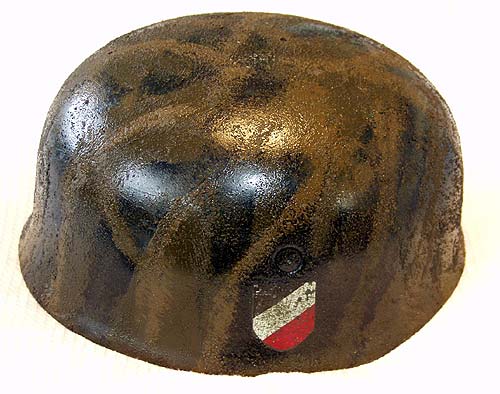
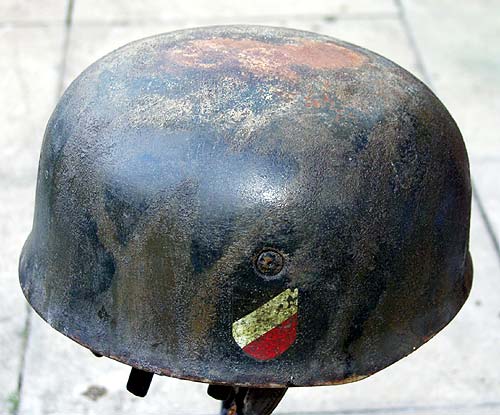
Pic 22 - Helmet painted up in final camouflage colour's. |
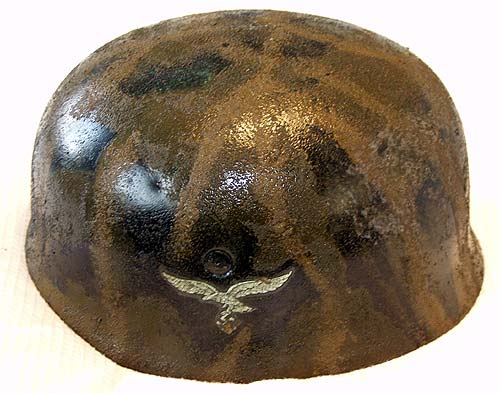
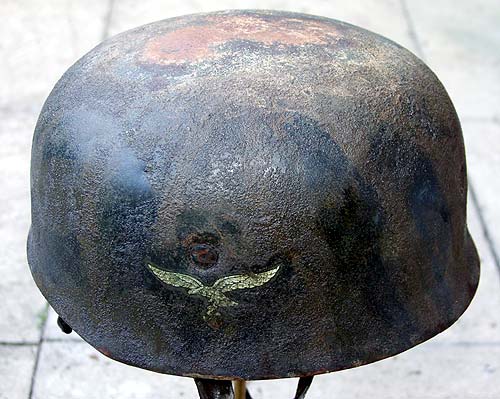
Pic 23 - Eagle side of painted helmet. |
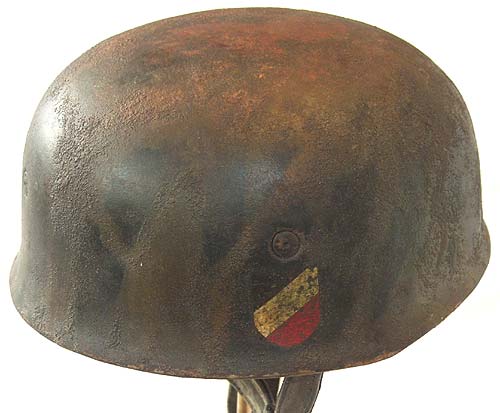
Notice how the helmet has been given a new lease of life with the fresh paint. Its all shiney and new looking, but that will soon change. A point on paint, back in WW2 the Germans did not have the huge choice of colour's or the technology to make every helmet the same shade, so even genuine helmets will have variations of colour's/shades. Use deep browns, reds and apple greens and of course luftwaffe grey and buy a good reference book to copy the camouflage schemes. I use enamel based paints to give it a certain durability. Mix your colour's together taking a note of the quantity mix. I use approx. 3 to 1 ratio of dark green to black in order to darken the green. You will notice the final touch - mix in some fine sand to the paint mixture to give it a rough texture. Many Fallschirmjager did this using sand, sawdust, earth or whatever was to hand. I have gone for a Normandy camo scheme - greens and browns. Normandy was the last action this Fallschirmjäger saw, after this he lost his helmet in combat and it lay in a ditch near to the coast for several years. As you can see in picture 24 the aluminum has tarnished with the salty water and the straps and buckles are all starting to rust. |
Pic 24 - Corroded aluminium band & rusty fittings. |
Pic 25 - corroded & rusty fittings. |
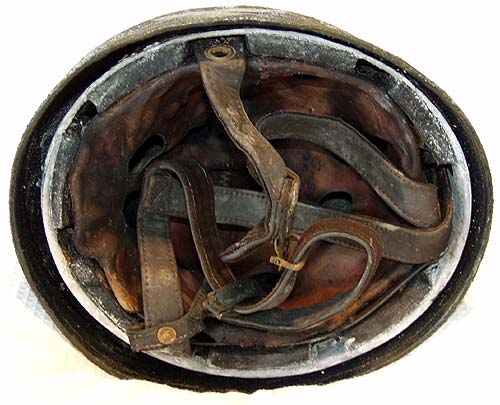
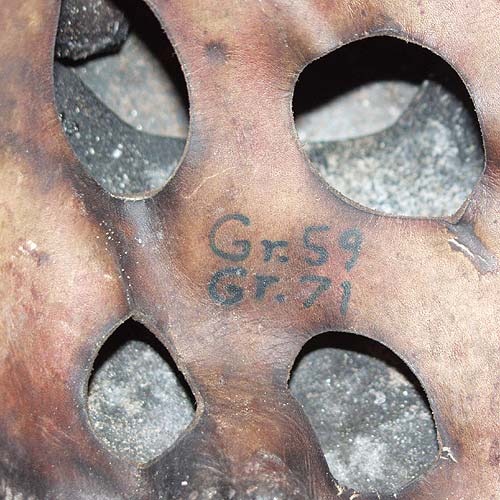
| Picture 26 shows how well the helmet liner markings have stood up to the ageing process. These will need to be darkened later in the process as it is all to easy to see that they were put there by hand. This is a good reason for buying a good quality replica with markings already in place. |
Pic 26 - Liner markings still visible. |
| The next picture shows how the helmet was re-weathered, although it still looks new. The important point is that the rust on the shell looks good. This was applied using three common household chemicals and a blowtorch! It's starting to look 'the business'! |
Pic 27 - Initial re-weathering. |
| Picture 28 below shows another view of the rusting process. |
Pic 28 - Rusting process with Luftwaffe Eagle. |
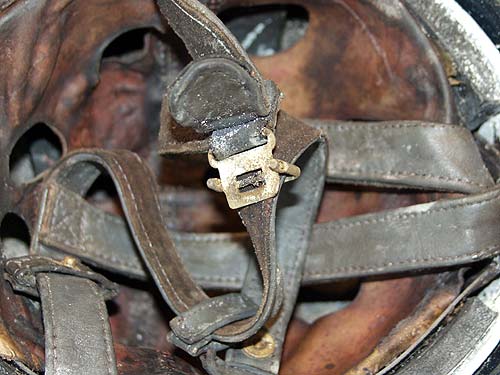
| Picture 29 shows how the liner, which had become detached is reattached using super glue or a similar glue. Use clips to keep it in place whilst the glue dries. I kept it overnight like this just to be sure! |
Pic 29 - Liner being reattached. |
| After the liner has been fixed the final ageing can begin. I use cigarette ash to darken the whole helmet, rub it in across the whole outer and inner shell! Once this has been done use decking oil to make a rich and deep patina. don't forget the inner rim also. |
Pic 30 - Shell darkened with cigarette ash. |
| You may need to touch up some of the bear metal. Use furniture wood stain and allow it to dry for 3 to 4 days. |
Pic 31 - Deep patina applied. |
| Finally the helmet is complete - see picture 32 below for before and after pictures. This helmet sold for £335 pounds as a replica! So beware, its easy to fake them and even replicas such as this helmet command high prices! |
Pic 32 - After and before pictures. |